Why Won't My XML Import into DaVinci Resolve? 9 Fixes
Fix XML imports that fail in DaVinci Resolve by checking format, source media, timecode, frame rate, effects, paths, and relinking.
Why won't my XML import into DaVinci Resolve?
An XML may fail to import into DaVinci Resolve when the format, source paths, timecode, frame rate, or media handoff does not match the project. Cutsio can simplify the pre-edit handoff by keeping the approved source clips and exported timeline together before you relink in Resolve.
Short answer: XML imports usually fail because Resolve cannot interpret the selected XML variant, find the referenced media, match the timeline frame rate, or translate effects and nested structures from the original NLE.
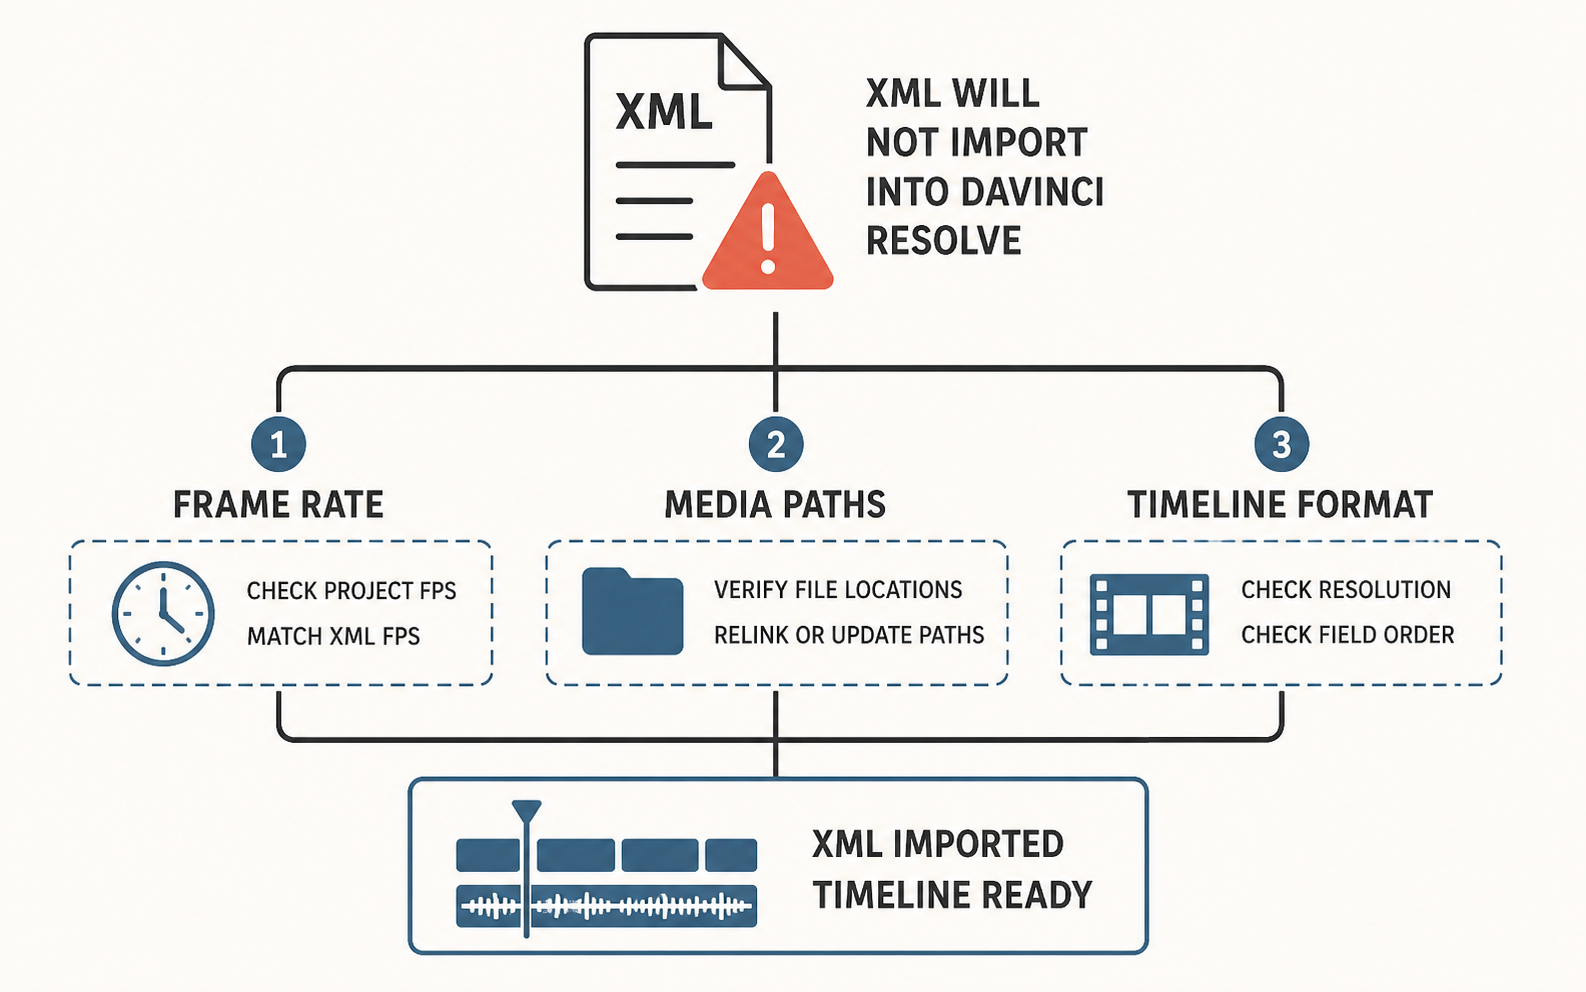
An XML is a timeline interchange file, not a self-contained video project. It describes clips, source timecodes, edit points, tracks, and some metadata. The receiving application still needs access to compatible source media and must understand the structure written by the exporting application.
Start with the simplest diagnosis:
- Confirm which application created the XML.
- Confirm whether it is FCPXML or the older FCP 7 XML format.
- Open the file in a text editor and verify that it is not empty or truncated.
- Import a short test sequence with one or two source clips.
- Check the Resolve import log and note whether the failure is format, media, timecode, or effect related.
Do not begin by deleting the entire timeline or assuming the source edit is unusable. Most failures can be isolated to the interchange format or one class of timeline element.
What is the difference between FCPXML and FCP 7 XML?
Short answer: FCPXML is the newer Final Cut Pro interchange format, while FCP 7 XML is the older track-based format used by many cross-application workflows. The correct choice depends on the exporting application and the Resolve version.
If the XML came from Final Cut Pro, use the export option intended for interchange with the receiving application. If it came from Premiere Pro, export the XML format supported by the Premiere-to-Resolve workflow rather than renaming an FCPXML file by hand.
Do not change .fcpxml to .xml and expect the internal structure to change. The extension is only one part of the format. A receiving application reads the XML schema and the media references inside it.
When testing a failing import, use a simple sequence containing ordinary video and audio clips. Remove compound clips, multicam structures, third-party effects, and nested timelines from the test. If the simple sequence imports, add complexity back one category at a time to find the element that breaks the handoff.
How do you prepare a timeline before exporting XML?
Short answer: duplicate the master sequence, preserve the original source media, simplify unsupported effects, and verify frame rate and timecode before export.
Use this preparation checklist:
- Duplicate the sequence and name it for the interchange, such as
Project_For_Resolve. - Confirm the sequence frame rate and dimensions.
- Remove or render effects that the receiving application cannot interpret.
- Flatten or simplify nested, multicam, and compound structures when the handoff requires it.
- Check that every used clip has stable filename, reel, and timecode metadata.
- Remove unused tracks if they make the handoff ambiguous.
- Export a reference movie with visible timecode.
- Export the XML from the duplicate sequence.
Keep the master edit untouched. An interchange sequence is a translation layer and may need compromises that are inappropriate for the editorial master.
Why does Resolve import the XML but show Media Offline?
Short answer: Resolve can read the timeline instructions but cannot find the source files at the paths stored in the XML.
This is the most common partial-import problem. A timeline may appear with the right number of cuts while every clip is red or offline. The XML contains references such as filenames, reel names, timecodes, and file paths; it does not carry the media itself.
Fix it in this order:
- Import the original source media into the Resolve Media Pool.
- Select the offline clips and choose Relink Selected Clips.
- Point Resolve to the common parent folder containing the original files.
- Confirm that the matched clip has the right duration, resolution, and visible content.
- Scrub the beginning, middle, and end of the conform against the reference movie.
If the files moved from one operating system to another, the path prefix will be different. Relinking to the correct media root is safer than manually editing every path in the XML.
How do frame rate and timecode mismatches affect XML import?
Short answer: mismatched frame rates can shift edit points or cause the receiving application to interpret source timecodes incorrectly, especially when the sequence and project settings disagree.
Before import, record these values from the source edit:
- sequence frame rate;
- source clip frame rate;
- timeline resolution and pixel aspect ratio;
- starting timecode;
- audio sample rate;
- whether the footage uses variable frame rate.
Create the Resolve project with the intended timeline frame rate before importing when possible. If Resolve asks whether to change the project settings to match the incoming timeline, read the prompt carefully and choose the setting that matches the locked edit.
Variable-frame-rate phone and screen recordings are a common source of trouble. Transcode them to a stable editing format with a known frame rate before the XML handoff, then export the XML using those stable references. Do not use a compressed proxy with different duration or timecode and assume it will conform exactly to the camera original.
Which effects and timeline structures do not survive XML?
Short answer: XML is strongest at carrying basic clip placement and timing; complex effects, transitions, titles, nested timelines, and application-specific automation may not translate.
Expect to rebuild or render elements such as:
- third-party plugins;
- advanced color corrections;
- custom title animations;
- complex speed ramps;
- adjustment layers;
- nested or compound clips;
- multicam decisions that depend on application-specific metadata;
- transitions with unsupported parameters.
The safest conform sequence contains the editorial cuts and enough source context for finishing. Add a reference movie so the colorist or finishing editor can compare the imported timeline with the intended result. If a title or transition is essential for visual reference, include a separate reference layer or a textless and graphics version of the movie.
How do you troubleshoot an XML import one problem at a time?
Short answer: reduce the sequence to a controlled test, import it, and add back tracks or effects until the failing element is isolated.
Use a diagnostic sequence with:
- One ordinary video clip.
- One audio clip.
- One cut.
- No effects or transitions.
Export and import that sequence. If it fails, the issue is likely the format, file, Resolve version, or project setup. If it works, add a second video track, then audio tracks, then transitions, then titles, and finally nested or multicam elements. Re-export after each addition.
This binary-search approach is faster than repeatedly exporting the full master sequence. Once the problematic class is known, prepare the production XML with that class removed or rendered and keep the original version for the master edit.
When should you use an XML or EDL from Cutsio?
Short answer: use Cutsio when you want to search footage, remove silence, assemble a rough selection, and hand the edit decisions to a supported NLE without rendering every exploratory cut into a final file.
Cutsio is useful before the finishing stage. Upload supported media, use transcripts and Semantic Search to find spoken moments, use Visual Intelligence for scenes and objects, assemble a pre-edit, and export the appropriate XML or EDL for the NLE workflow. The finishing editor still needs the original media available locally and should verify the handoff against the source.
After the finishing export is ready, use Cutsio as the review layer: share a branded presentation with secure link controls, frictionless high-fidelity playback, view tracking, frame-accurate feedback, and an explicit approval gate. That separates timeline construction from client sign-off without forcing the client into the editing application.
How do you verify a successful XML conform?
Short answer: compare the imported timeline with a reference movie at the beginning, middle, and end, then inspect transitions, audio sync, handles, and any sections that contained effects.
An import that opens without an error is not necessarily a correct conform. Scrub across every major edit, check that the first and last frames of important shots match, and listen for missing or shifted audio. Compare the imported frame rate and duration with the reference. If the timeline is shorter, longer, or begins at a different timecode, stop before grading or mastering.
Keep the reference movie and the interchange sequence together in the handoff folder. Mark any intentional differences, such as titles or effects that were removed before export. This turns XML validation into a documented finishing step rather than a visual guess made after the original editor is unavailable.
FAQ
Does an XML file contain the video clips?
Short answer: no. XML contains timeline instructions and media references. The receiving system still needs access to compatible source files.
Should I use FCPXML or FCP 7 XML?
Short answer: use the format supported by the exporting application and the Resolve workflow you are targeting. Do not rename one XML schema into another.
Why are my clips offline after a successful XML import?
Short answer: Resolve read the timeline but could not resolve the media paths. Import the source media and relink the clips to the correct parent folder.
Will transitions and plugins transfer through XML?
Short answer: not reliably. Treat XML as a way to transfer timing and clip structure, then rebuild or render unsupported effects in the finishing application.
Can Cutsio export an XML for DaVinci Resolve?
Short answer: yes. Use Cutsio for search and pre-editing, export the supported timeline handoff, and finish with the original media in Resolve.
Related reads
- EDL vs XML in DaVinci Resolve: When to Use Each Format — Use EDL for bulletproof single-track conforms and pre-conformed color workflows. Use XML for multi-track timelines, audio automation, and complex metadata. Here is exactly when to choose each format in DaVinci Resolve.
- How to Conform ARRI RAW and RED R3D Dailies in DaVinci Resolve: From Cloud Review to Online Finish — Step-by-step conform workflow for ARRI RAW and RED R3D dailies — download original camera files from Cutsio, relink in DaVinci Resolve, match the review stream color, and deliver the online finish.
- Troubleshooting AI Transcription Timelines in Final Cut Pro and DaVinci Resolve — Learn how to fix audio desync, missing transcript segments, and export errors when using AI transcription timelines in Final Cut Pro and DaVinci Resolve, and how Cutsio simplifies the workflow.