How to Relink Missing Media in DaVinci Resolve
Relink missing media in DaVinci Resolve by [locating offline clips](https://cutsio.com/blog/best-way-to-fix-offline-clips-in-davinci-resolve), choosing the correct folder, matching metadata, and validating the timeline safely.
How do you relink missing media in DaVinci Resolve?
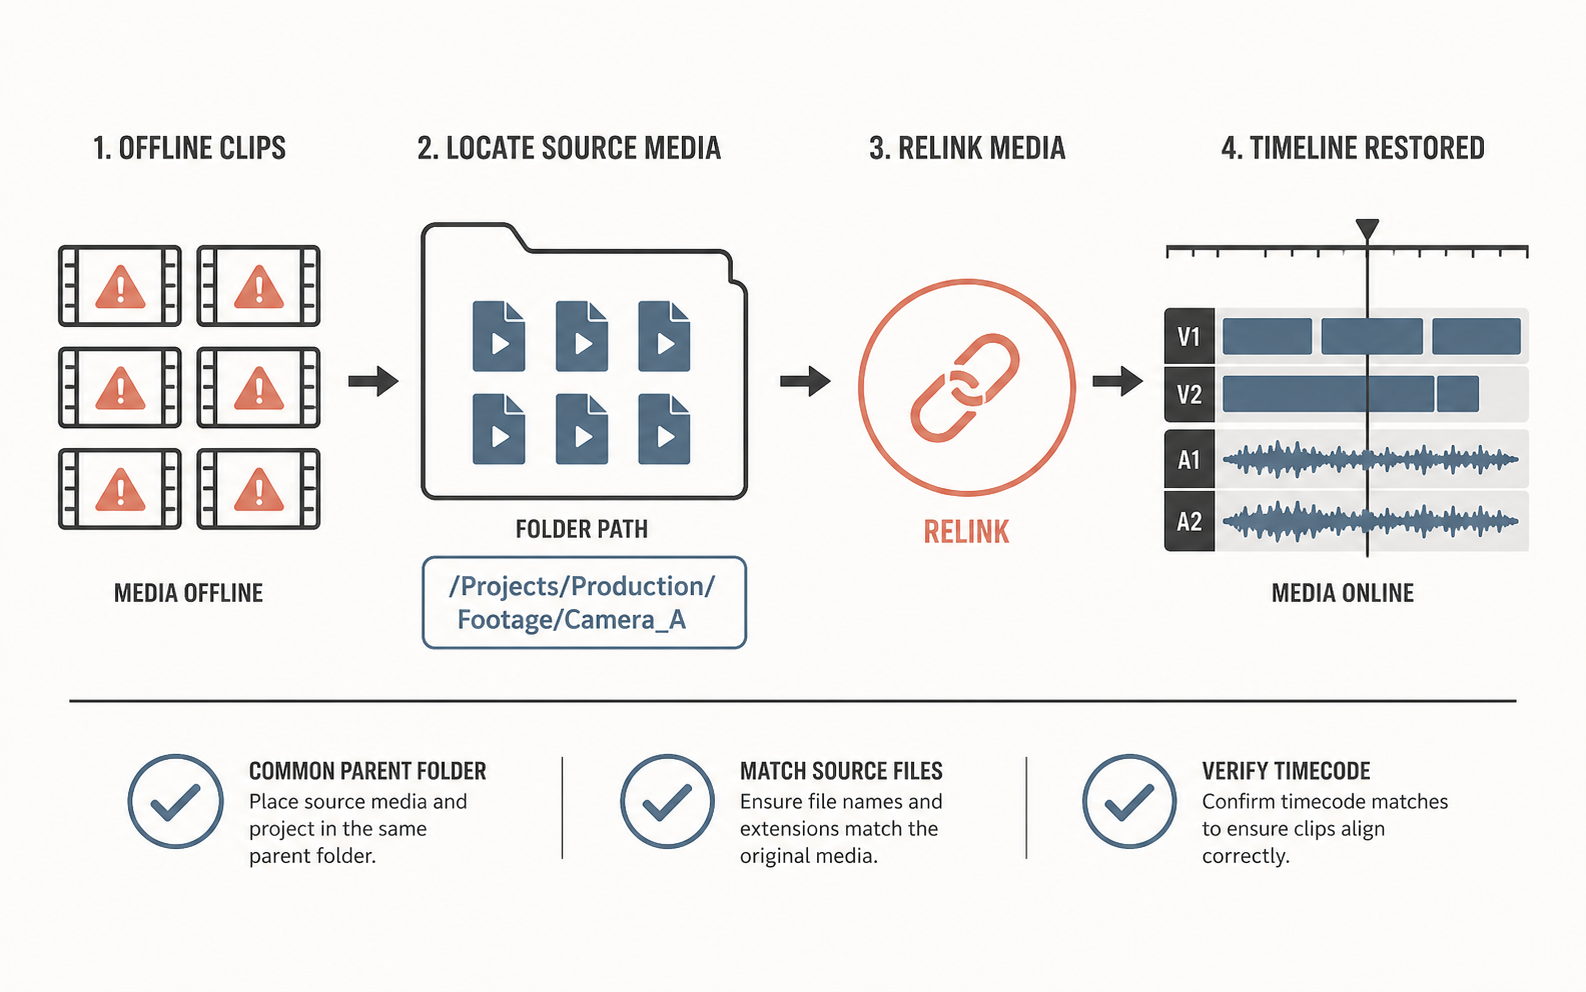
Relink missing media in DaVinci Resolve by selecting the offline clips, pointing Resolve to the folder containing the original files, and checking that filenames, extensions, timecode, and reel metadata match. Cutsio provides a searchable source library that can make it easier to identify the correct footage before a relink or XML handoff.
Short answer: select the offline clips in the Media Pool, choose Relink Selected Clips, and point Resolve to the highest folder that contains the original source files. Then verify several matches before saving the project.
What is the safest relink test?
Choose one representative clip from the missing-media list and verify its image, audio, duration, and timecode after relinking. Once that match is correct, use the same source root for the remaining clips and save a new project version before continuing the conform.
Relinking reconnects an existing clip in the project to the media file it is supposed to use. It does not change the edit decisions, trims, or timeline structure. The safest workflow is to restore the original path or a clearly verified replacement rather than importing a random file with a similar name.
Before opening the relink dialog, find a known source clip outside Resolve. Confirm that the drive is mounted, the file opens, and the file belongs to the project. If the project came from another editor, ask for the source-media root and the expected folder structure. A good media handoff is easier to relink than a collection of files copied into unrelated folders.
How do you relink offline clips from the Media Pool?
Short answer: select the affected clips, use Relink Selected Clips, choose the common parent folder, and let Resolve scan its subfolders.
- Open the Media or Edit page.
- Locate the bin containing the clips marked Media Offline.
- Select the affected clips. Use Shift-click for a range or select all clips in a dedicated bin.
- Right-click and choose Relink Selected Clips.
- Navigate to the parent folder containing the original footage.
- Start the scan and wait for the relink to finish.
- Check the Media Pool and scrub multiple parts of the timeline.
Choose a useful parent folder. If all camera files live under Project/Media, choose that folder rather than one individual card folder. If the media is scattered across several drives, relink one group at a time so you know which source Resolve matched.
Do not close the project immediately after the first clips turn online. Check a clip near the start, middle, and end of the edit. Compare duration, frame size, timecode, and visible content. A file with the same name can still be the wrong take.
How do you fix relinking when a drive or folder moved?
Short answer: mount the correct drive, locate the new media root, and relink from that root instead of trying to reproduce every old path manually.
A project stores references to where the media was located when it was imported. If a drive is renamed, a folder is moved, or the project is opened on another computer, the path may no longer exist. The footage can be perfectly healthy while Resolve shows it as offline.
Use this sequence:
- Connect the drive containing the source media.
- Confirm the operating system can read the drive and the current user has permission.
- Open a known source clip outside Resolve.
- Identify the highest common folder for the media.
- Run Relink Selected Clips and point Resolve to that folder.
- Save the project after the timeline has been checked.
On a cross-platform handoff, the path prefix may change from a macOS volume to a Windows drive letter. That is normal. The goal is not to make the strings identical; it is to make Resolve resolve each reference to the correct file.
When should you use a deep search?
Short answer: use a deep search only when the media is genuinely distributed across many nested folders and you cannot identify a smaller, reliable media root.
A broad search can save time on a disorganized drive, but it can also be slow and can produce ambiguous matches when several cards contain repeated filenames. Start with the narrowest folder that should contain the source. Expand the search only when the first pass leaves known clips offline.
If your version of Resolve exposes a deep-search option in the relink window, use it after selecting the correct drive or project folder. Review the results instead of assuming that every match is correct. For projects with repeated camera filenames, compare reel names, timecode, duration, and content.
The best long-term fix is a stable media structure. Keep camera cards under project folders, preserve original filenames, and avoid copying multiple unrelated projects into one search root.
How do you relink proxies or optimized media?
Short answer: decide whether you are reconnecting the original media, proxies, or optimized media, and do not mix those roles accidentally.
Proxies and optimized media can make playback smoother, but they are not always the files you want for a final conform. If the timeline is offline because the original media is disconnected, reconnect the original files first when the project is ready for finishing. If the goal is only to edit on a slower machine, relink or attach the intended proxy set and confirm that proxy mode is enabled.
Use a consistent naming convention for proxies, such as adding _proxy to the original basename, and store them in a predictable project folder. Keep a written mapping between original and proxy files. If the filenames, durations, or timecodes differ, Resolve may not be able to match them automatically.
After relinking, switch between proxy and original viewing modes and check a few shots. If the picture changes unexpectedly or a clip remains offline in one mode, stop and correct the media mapping before making more edits.
What should you do when the file extension changed?
Short answer: import the verified replacement media and replace the affected clip deliberately; do not assume that a changed extension is a safe automatic match.
A transcode from .braw to .mov, or from one camera format to another, may change metadata even when the picture appears identical. A filename match is not enough when there are multiple takes or versions.
For a small number of clips:
- Import the replacement files into a separate bin.
- Compare duration, frame rate, resolution, and visible content.
- Replace the offline clip using Resolve’s clip-replacement command.
- Scrub every timeline occurrence of the replacement.
For a large conform, return to the source NLE and export a new interchange file that references the replacement media. That keeps the mapping explicit and avoids silently assigning the wrong file to dozens of edits.
How do you prevent relink problems on future projects?
Short answer: preserve project structure, keep source media stable, and test the handoff on another computer before the deadline.
Use this checklist:
- Preserve the original camera-card folder structure.
- Keep audio, graphics, and source video under a documented project root.
- Avoid renaming source files after the edit begins.
- Store proxies in a separate, clearly named folder.
- Export a reference video with visible timecode for a conform.
- Record the project frame rate and source-media locations.
- Open the project or XML on the receiving machine before delivery.
If you use Cutsio to search footage, remove silence, or prepare a rough timeline, keep the original source media available for the final NLE handoff. The searchable workspace can reduce the time spent logging and selecting clips, but the finishing editor still needs a verified media path.
How do you verify a relink without choosing the wrong take?
Short answer: compare the first relinked clips with a reference export and verify metadata before accepting a large batch of matches.
Repeated camera filenames make this check important. A folder may contain C0001.mov from several cards or shoot days. Resolve can bring a file online while still choosing the wrong recording if the available metadata is incomplete. Check the reel, duration, timecode, frame size, and visible action around a known edit point.
For a large project, verify one clip from each camera, day, and media type. Keep a short conform note that records which folders were scanned and which clips were replaced manually. If a later editor reopens the project, the note explains why the media is online and where the source files belong.
FAQ
Does relinking change my edits?
Short answer: no. Relinking reconnects a project clip to media; it should preserve the timeline edits when the correct source is matched.
Why did only some clips relink?
Short answer: the remaining clips may live in another folder, use different metadata, be proxies, or be damaged or unsupported.
Should I relink to proxies or camera originals?
Short answer: relink to proxies for lightweight editing and camera originals for final finishing, while keeping the two media sets clearly separated.
Can I relink an entire project at once?
Short answer: yes, when the clips share a predictable media root. Select the affected clips and scan the common parent folder, then verify the result.
What if the source media is gone?
Short answer: restore it from the project backup or camera archive. If it cannot be recovered, use a reference export to identify the missing sections and replace them with verified alternatives.
Related reads
- [DaVinci Resolve Media Offline](https://cutsio.com/blog/how-to-fix-missing-media-davinci-resolve) After Import: How to Relink Clips — Fix DaVinci Resolve Media Offline after importing a project or XML by relinking folders, matching source files, checking drives, and repairing the handoff.
- How to Fix Media Not Linking in DaVinci Resolve — When the 'Relink Media' button fails, try these advanced methods to force DaVinci Resolve to link your media correctly.
- How to Fix XML Import Errors in DaVinci Resolve — Fix XML import errors in DaVinci Resolve by checking the interchange format, source media, timecode, frame rate, track structure, and unsupported effects one problem at a time.