How to Compress Video and Reduce File Size in DaVinci Resolve
Learn how to compress video in DaVinci Resolve, export MP4 with a small file size, and reduce file size without losing quality.
How to compress video and export a small file size in DaVinci Resolve?
The best way to compress video and export a smaller file from DaVinci Resolve is to match the codec, resolution, bitrate, and audio settings to the destination—not simply lower every setting at once. If a finished Resolve export is still too large for an upload form, email attachment, or client portal, Cutsio's free Video Compressor is the fastest practical fallback: choose a quality preset or target file size and download a smaller MP4 without uploading the file, creating an account, or adding a watermark.
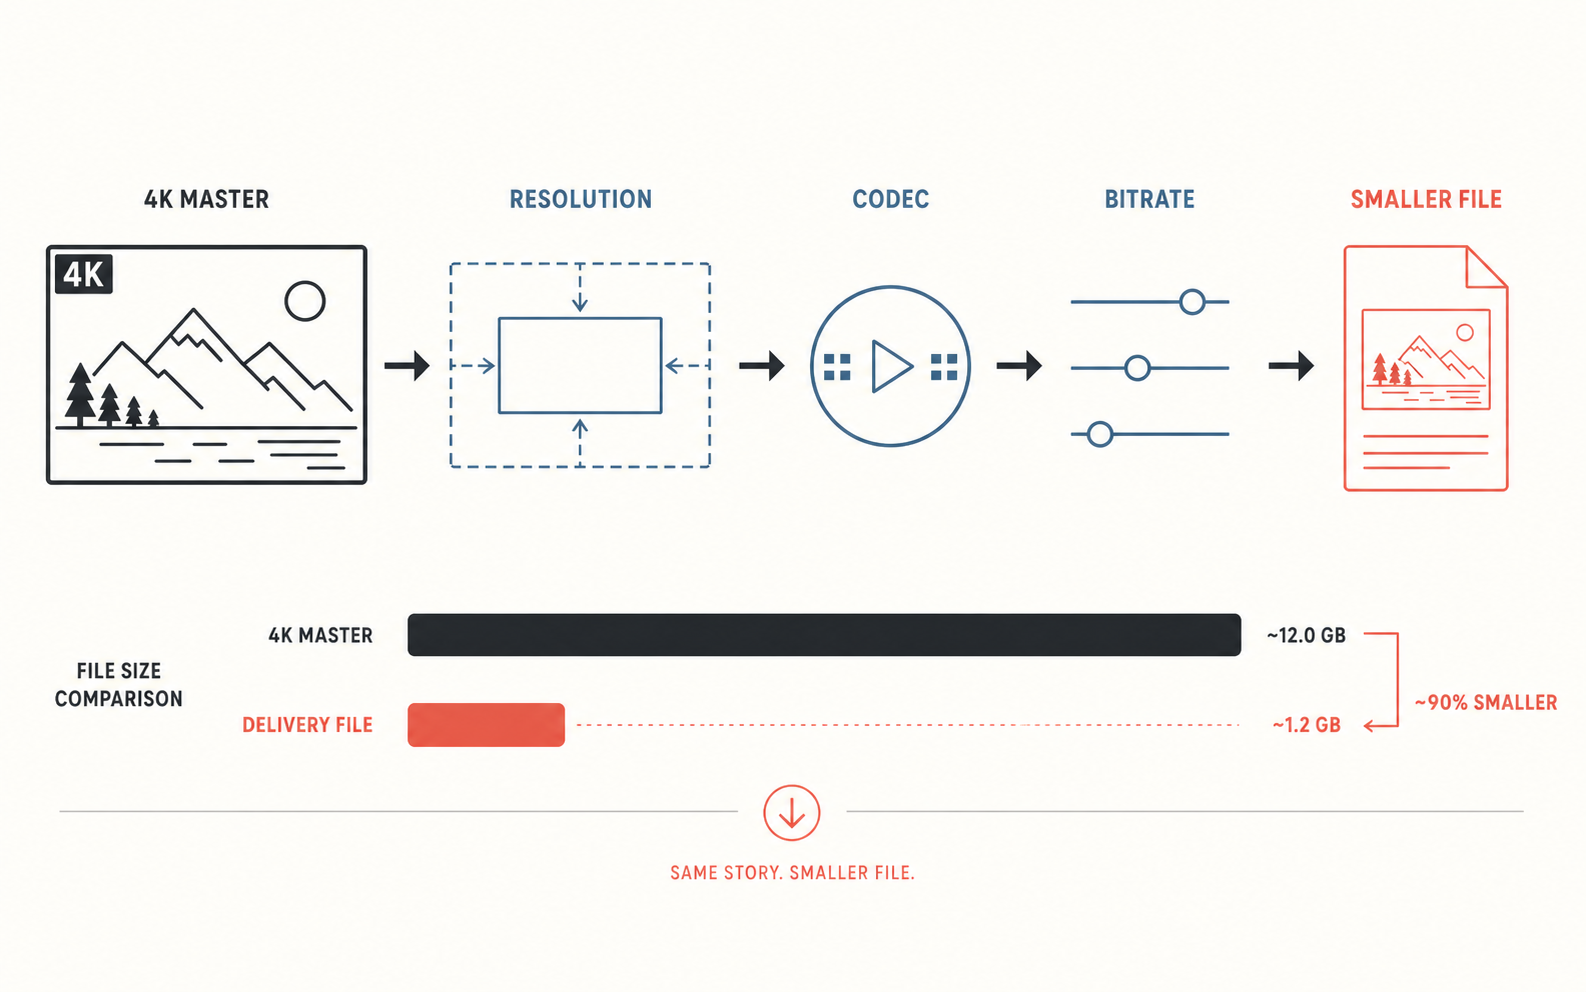
Small-file delivery is a balancing act. A high-bitrate 4K master is the right file for an archive, a color session, or a broadcaster that specifies its own delivery requirements. It is usually the wrong file for a sales deck, course upload, social preview, or stakeholder who needs to download it on a phone. The goal is not to make every export as small as possible. The goal is to make a file that looks and sounds right where it will actually be watched.
Start in Resolve's Deliver page with a Custom export. Choose the destination first, then set resolution, codec, video bitrate, and audio bitrate deliberately. Export a short test before committing to a long render. That simple sequence prevents the usual mistake: discovering a 6 GB file at the end of a deadline, then making a series of blind re-exports.
Which export settings have the biggest effect on file size?
Video bitrate has the largest direct effect on file size, while resolution, codec, frame rate, and audio bitrate determine how much bitrate the image needs to look good. A useful planning estimate is: file size in megabytes is roughly total bitrate in megabits per second multiplied by duration in seconds, divided by eight. The actual result varies with the container and encoding overhead, but the estimate is close enough to avoid surprises.
For example, a ten-minute video with 6 Mb/s video and 128 kb/s audio needs about 459 MB before container overhead. Reducing the video setting to 3.5 Mb/s takes that estimate to roughly 272 MB. That is why changing one visual setting without looking at bitrate often produces disappointing results.
| Setting | What it changes | When to lower it | Main trade-off |
|---|---|---|---|
| Video bitrate | The amount of data allocated per second | Any time the destination has a file-size limit | Too low creates blockiness, banding, and smeared motion |
| Resolution | The number of pixels in each frame | When 4K is not needed at the viewing size | Fine details and text become less crisp |
| Codec | How efficiently the video is encoded | When the receiving platform supports H.265/HEVC | H.265 is slower to encode and less universally compatible |
| Frame rate | The number of frames per second | Only if the delivery does not need the original cadence | Motion can look less natural if changed unnecessarily |
| Audio bitrate | The data allocated to sound | Dialogue-first or constrained deliveries | Very low settings can introduce audible artifacts |
Do not lower all five at once. If the picture becomes unacceptable, you will not know which choice caused the damage. Start with the codec and target resolution, set an appropriate video bitrate, then make a short test of the most demanding part of the cut: fast camera movement, gradients, low light, text, smoke, water, confetti, or detailed foliage.
How do you choose the right resolution before rendering?
Choose the smallest resolution that serves the intended screen and platform. A 1080p export is a strong default for most client reviews, presentations, web uploads, and desktop viewing. A 720p export is often sufficient for email-friendly previews, learning-management systems, and internal approvals. A 4K export is appropriate when the delivery specifically requires it or the viewer needs to inspect fine image detail on a large display.
In Resolve, go to the Deliver page, select a Custom preset, and set the resolution in the Video settings. You can export at a lower resolution without changing the project timeline or altering the original source media. That makes delivery compression a reversible choice rather than an edit decision.
The pixel difference is substantial. A UHD 3840 × 2160 frame contains four times as many pixels as a 1920 × 1080 frame. Reducing a 4K delivery to 1080p therefore gives the encoder far fewer pixels to describe. It is usually the cleanest way to make a large reduction when the audience does not need 4K.
| Delivery use | Sensible starting resolution | Why it works |
|---|---|---|
| Archive, broadcast, or high-detail client delivery | Keep the required source resolution | Preserve the specification and image detail |
| Website, pitch deck, client presentation | 1080p | Clear on common screens without 4K file weight |
| Course portal, email preview, internal review | 720p or 1080p | Choose based on text size and the portal's limit |
| Messaging or a strict upload limit | 480p or 720p | Prioritizes a reliable, quick transfer |
If the video contains screen recordings, small captions, UI demonstrations, or dense graphics, test the smallest important text before settling on 720p. A talking-head interview can look excellent at a lower bitrate and resolution; a product demo with tiny menus may need more data to remain usable.
Should you export H.264 or H.265 from DaVinci Resolve?
Choose H.264 when compatibility and predictable playback matter most; choose H.265/HEVC when you need a smaller file and know the destination supports it. H.265 generally retains more visual detail at a given bitrate, but it can take longer to encode and may be less convenient for older devices, older editing systems, or services with strict upload requirements.
On the Deliver page, choose a Custom export, set the Format to MP4, then choose the codec that fits the delivery. MP4 with H.264 is the safest all-purpose choice for a broad audience. MP4 with H.265 is a useful option for a controlled handoff, modern device playback, or an upload destination that explicitly supports HEVC.
Avoid treating codec choice as a magic file-size switch. H.265 helps you get more quality from a constrained bitrate, but the bitrate still sets the approximate file size. If you export H.265 at an unnecessarily high bitrate, the file can remain large. If you export H.264 at a sensible bitrate, it can still be perfectly appropriate for many web and client deliveries.
What bitrate should you use for a smaller export?
Use a bitrate that reflects the resolution, frame rate, motion, and destination rather than copying one number into every project. In Resolve's Video settings, use the Quality control to select a restricted bitrate when you need a predictable size. The figures below are practical starting points for standard frame rates; inspect a test render before sending the full file.
| Delivery format | Starting video bitrate | Audio bitrate | Good fit |
|---|---|---|---|
| 1080p H.264 | 6–10 Mb/s | 128–192 kb/s | General web, presentations, uploads |
| 1080p H.265 | 4–7 Mb/s | 128–192 kb/s | Modern destinations with a smaller limit |
| 720p H.264 | 3–5 Mb/s | 96–128 kb/s | Courses, internal review, email-friendly links |
| 720p H.265 | 2–4 Mb/s | 96–128 kb/s | Controlled delivery where HEVC is supported |
| 480p H.264 | 1–2.5 Mb/s | 64–96 kb/s | Messaging, strict file caps, low-bandwidth viewing |
Fast action, handheld movement, confetti, rain, sports, and intricate textures often need more bitrate than an interview against a stable background. Similarly, 50 or 60 fps footage requires more data than 24, 25, or 30 fps footage at the same resolution. If a file is just over the limit, make a modest bitrate reduction first. If it is several times too large, lower the resolution as well.
How do you set a file-size target instead of guessing at bitrate?
Work backward from the upload limit when a portal gives you a hard number. Reserve a little headroom below the stated cap, especially when the recipient may add the file to an email or another system that applies its own limit.
Use this approximation:
target total bitrate (Mb/s) = target size (MB) × 8 ÷ duration (seconds)Then subtract the audio bitrate to estimate the video bitrate. For a ten-minute video that must stay under 250 MB, the total budget is about 3.33 Mb/s. If audio uses 128 kb/s, start the video near 3.2 Mb/s. That budget suggests a 720p H.264 or 1080p H.265 test rather than a high-bitrate 1080p H.264 export.
If you already rendered the file and do not want to calculate settings again, use Cutsio's free Video Compressor. Its target-size control estimates an output bitrate from the video's duration, so you can specify the delivery limit directly. The conversion runs locally in the browser and produces an MP4 with H.264 video and AAC audio, which is useful when compatibility matters as much as the size cap.
When should you use the free Video Compressor instead of rendering again in Resolve?
Use the free Video Compressor when you have a completed export that is too large, need a quick shareable MP4, or need to make several delivery-sized variants without reopening the Resolve project. Keep Resolve as the first choice when you still need to change titles, captions, color, audio, or the creative edit.
The two tools solve adjacent problems:
| Situation | Best next step |
|---|---|
| You have not rendered yet | Set the correct resolution, codec, and bitrate in Resolve |
| The upload rejects an otherwise finished export | Compress the rendered file to the required limit |
| You need a quick 720p or 480p MP4 for sharing | Use the free Video Compressor preset |
| The final version needs a creative or technical correction | Return to Resolve and render again |
| You need a review link instead of another file attachment | Share the video from your Cutsio workspace |
The Video Compressor is deliberately simple: it processes one file in your browser, does not upload the media, and does not require signup or add a watermark. Pick 1080p when visual fidelity is still the priority, 720p for a practical quality-to-size balance, or 480p for aggressive reductions. For precise upload limits, choose the target-size option and leave room below the destination's maximum.
For editors managing a wider library—not one delivery file—Cutsio can also keep footage organized and searchable before it reaches Resolve. Cutsio's Visual Intelligence analyzes the visual content of every frame alongside audio, creating a unified search index for any moment. That helps you find the exact shot or spoken line to revise without searching through folders or scrubbing an entire timeline.
What audio settings keep an export small without making it sound poor?
For most web and presentation exports, AAC audio at 128 kb/s is a sensible dialogue-first starting point. Use 192 kb/s when music quality matters more, and consider 96 kb/s only for constrained previews where speech is the main concern. Stereo generally makes sense for consumer playback; do not include extra tracks or high sample-rate settings unless the delivery actually needs them.
Audio seldom causes a multi-gigabyte delivery by itself, but it matters when the video is short or the file-size limit is tight. A 128 kb/s audio track consumes roughly 58 MB per hour. Removing unnecessary tracks and choosing a reasonable AAC bitrate makes the export budget more predictable without compromising the main video decision.
How should you check a compressed Resolve export before sending it?
Check the exported file at the destination resolution and on the type of screen your viewer will use. Do not judge a 720p delivery only while it is enlarged on a high-resolution editing monitor. Watch the full file once, then inspect the sections most likely to break under compression.
Use this short QC list:
- Check fast motion for blockiness or stuttering.
- Pause on gradients, skies, shadows, and skin tones to look for banding.
- Read the smallest title, caption, or interface label.
- Listen for warbling, pumping, or brittle audio in music and dialogue.
- Confirm the duration, frame rate, and aspect ratio match the intended delivery.
- Upload a test file to the real destination if the platform will re-encode it.
Keep a higher-quality master or archive export separate from the small delivery version. A compressed share file is not a substitute for the project, camera originals, or a high-quality master. Clear filenames such as project_v12_master_4k.mov and project_v12_client-review_1080p.mp4 make that distinction obvious when deadlines are tight.
FAQ
Does lowering the bitrate always make a DaVinci Resolve export smaller?
Yes. A lower video bitrate generally produces a smaller file because less data is allocated to each second of video, but lowering it too far causes visible compression artifacts.
Is H.265 always better than H.264 for smaller files?
No. H.265 is usually more efficient, but H.264 remains the safer choice when broad compatibility, quick encoding, or an older receiving system matters.
Can I reduce a 4K DaVinci Resolve export to 1080p without changing my timeline?
Yes. Set a 1920 × 1080 export resolution in the Deliver page; your existing timeline and source media remain unchanged.
Can I compress a DaVinci Resolve export without uploading it to a server?
Yes. Cutsio's free Video Compressor runs in your browser, so the file stays in the browser tab while it is compressed into a smaller MP4.
What should I do if my video is still too large after lowering the bitrate?
Lower the resolution, use H.265 where the destination supports it, or use a target-size compression pass on the finished export. Always review the result before delivery.
Related reads
- Best AI Tools for DaVinci Resolve in 2026 — Compare DaVinci Resolve 21 AI tools for search, script assembly, reframing, audio, and finishing—and see where an upstream AI-powered MAM saves more time.
- What Is the Difference Between Cloud NAS and an AI Video Library? — Cloud NAS and AI video libraries solve different problems. Learn when storage access is enough, when you need frame-level search, and how Cutsio gets footage into an editor-ready timeline.
- Best AI Video Editing Software for Pro Editors in 2026 — The best AI video editing software for pro editors in 2026 includes DaVinci Resolve for advanced color and compositing, and Final Cut Pro for speed and audio isolation, but these tools must be paired with Cutsio for high-fidelity client delivery.